5 Tips for Teaching with Google Classroom

With many school districts considering going the virtual learning route in the upcoming weeks it is important to start thinking about how this might look for your students. There are so many great apps and extensions to use, but the thought of coming up with a plan from scratch can seem overwhelming. Here are 5 simple tips to help get you started creating a "digital classroom" for your students. You don't need to be a Google Expert just having a well thought out plan that has simple and clear steps for families will help to make this an easier transition.


1. Weekly Plan

Think about how your class is run and what a typical week looks like. Once you have this invisioned in your mind then it's just finding a way to translate this to a simple outline. This will be helpful to families trying to support their kids and also to students who can reference this as a daily checklist. If you have reading or math rotations keep them. They will just be completing them independently for a little while. Sticking with the routine will be easier for students to follow and less explaining for you to families.


2. Create Your Google Classroom

If you already have a Google Classroom, great! If not it's ok click the link here to watch a video for how to create one. Whether you have one already created or not consider creating a new one for your virtual classroom so all of the work that you post is in one place. This way students and families will just see the assignments they should be working on instead of seeing every assignment in the past and become overwhelmed.


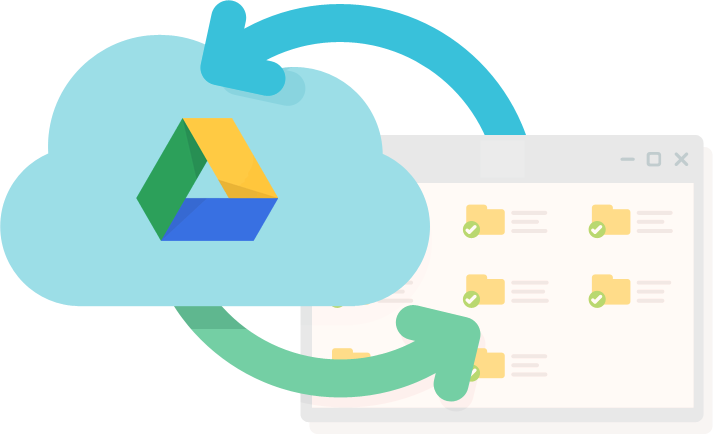
3. Organize Your Drive

After you have an outline for yourself and a classroom for the students don't start posting yet. Go into your drive and create a new folder. I called mine "virtual classroom". Then create a sub folder    "Day 1" "Day 2"...etc. This way you can group the files you plan to post each day in a seperate place. If you aren't sure how to create a folder or need a little refresher click the link here to see how I organize my drive each school year. Here is a visual of what mine looks like in my drive.

📁Virtual Classroom Week 1
     📂 Day 1
            -plans
            -digital states activity
            -digital vocabulary cards
            -digital writing notebook 180 prompts
            -digital writing notebook
     📂 Day 2
     📂 Day 3
     📂 Day 4
     📂 Day 5

4. Schedule Posts

Once you have your drive organized and ready to go it is time to start scheduling posts! Before I start scheduling I like to make a little outline of each day of the week. Then when I sign into Google Classroom in the morning I can just go throught my checklist and make sure I am posting all the assignments I need for the day at the same time.


5. Start and End with a Picture

The last tip for organizing your classroom is to find ways to separate the work each day so students know where one day begins and ends. You can do this by posting a picture like I did to the left each day to let them know you are about to post the work. Also it might be nice to end the day with another image whether it is a positive quote or meme. Even though we can't literally be with the students we still need to make sure we are sending positive messages of encouragement to motivate them to keep carrying on at home.

I hope you found this helpful to get started with creating your own digital plans. If you don't have activities that are digital that you can post in the classroom I did create a week of virtual plans for 4th grade. Click the link below for the plans. All  you need to do is follow the steps to post them and you will be good to go. I'll be working on another week of virtual plans for grade 4 as well so be on the look out for that! If you have any questions don't hesitate to reach out! I hope this helps to make your life a little easier :)

No Prep Virtual Learning Plans


Creating Your Class Website

One of the most important parts at the start of every school year is creating a positive relationship with students and families. Using technology allows us to be able to do this is ways we couldn't before. There are a lot of different ways to go about doing this but one way I have found works great is by creating a class website! Google Sites is a fun way to engage students and families and with their new template options it is fast and easy! Here is how you can get started!

The first thing you need to go is go to Google Sites. You can find the widget with your other apps, or just google it, and it comes right up. Next in order to create a site, click the plus button in the bottom right hand corner of the screen.

After you have done that it will bring you to your new website. You can then give it a title in the upper left hand corner of the screen and start picking a theme and any images you want to add. In the lower corner of the banner on the left side you will see a change image button if you hover over the corner. Click on that to select one of the images they have, search the web, or upload your own image from the computer. Once you select the image it will automatically adjust the brightness to the text will still stand out.


After you have the header complete it is time to start adding content! On the left land side of the screen there are a bunch of templates you can choose from if you want something fast and easy. Once you click a template you it will pop up on the website and you can click the icons to fill in texts and get images off the web or upload from your computer. You can also just add text images on your own too by clicking the items on the left hand side.

I like to make that first page a home page with basic classroom information and a calendar with events that the parents will be able to see. It's also nice to put contact information, open house information the parents might have missed or want to see again, and any handouts or forms you want them to have access too. (Just make sure that the sharing settings are on with the document so "anyone with link" can view the item.

Next I like to make a page for each subject. You can do this by clicking the "pages" tab on the left hand side of the screen in between the "insert" and "theme" tab. Then you will see your home page you created, but also notice the plus sign at the bottom of the tab. Click the plus sign and title your new page. Repeat the process by adding as many pages and templates as you need for your classes.

Once you have finished click the eye icon in the top right corner of the screen to preview your site. When you are satisfied with out it looks click "publish" and it will go live. Then you and share it by coping the link or sending the link directly to people by the two links next to the publish button!

Extra Tips
  • Set aside some time once or twice a month to update so it stays updated, but doesn't become too overwhelming for you.
  • Take pictures in the classroom as you go (keep in mind photo permissions). I usually just try to do notebooks/ action shots of games and experiments without student faces 
  • Don't forget to let people know you updated the site / push out the link frequently using email / remind app.

Making Grading Easier With Google Forms


Correcting tests and exit slips can become very time consuming with multiple classes of the same subject. I started slowly transitioning some exit slips over digitally and it has made life so much easier! It is great because it saves time for us, but it also gives students the immediate feedback which is so important! Here are some tips to get you started if you want to give this  try in your classroom!

First go to google forms and select the type of form you want to create; blank, blank quiz, assessment, exit ticket, worksheet or course evaluation. I usually just do blank quiz, but pick the one that is best suited for your needs.


After you have done that you need to give the document a title and type in your directions for the task. After that is complete you can add your first question on the purple line. It is automatically set to multiple choice, but if you click on "multiple choice" you can change it to short answer, paragraph, drop down, add images, or scales depending on the type of question.


When you have finished with the question and answers I always like to click the blue "answer key" link underneath the question. This will allow you to give each question a point value and highlight the correct answer to have the computer correct the question for you. (Keep in mind you will have to review short answer yourself, but it works great for multiple choice questions.)


If you need to add more questions keep hitting the "+" button to add as many questions as you need. Make sure to keep adding the point values and answer keys tp each question as well. When you have finished click the settings icon up in the right hand corner. 


Under the general tab you can make sure to collect email addresses and limit responses to one time. Under the quizzes tab I like to check off release grades immediately after submission if this is multiple choice it is the fastest way to get the score report for you and grades out to the students.
The you can send this to students by clicking the send button, or pushing out the link in Google Classroom and you will be all set!


Extra Ideas

  1. Quizzes
  2. Exit slips
  3. Missing Worksheets / Activities (turn into form so it doesn't get lost)
  4. Absent work
  5. Task card recording sheet

I hope this is helpful and makes your life a little easier! Let me know any other ways you use forms in your classroom below!! 


Organizing Curriculum With Google Drive

Image result for google drive

Organizing Google Drive is another way to get planning over the summer without having to go into school. With a huge technology shift in education, many of our resources are digital which is great but storing them can become overwhelming when you forget what a file is called. Also teachers that frequently change grade levels like I have the first 5 years of teaching, I learned quickly that I needed to find a way to compile and organize my resources so if I had to pick up and change grades, or schools, i was ready without having to start from scratch each time.

Here is what my drive looks like currently


Each year I always start out by creating a new folder for the school year. If you are staying in the same grade you might not need to create a new one just build off the library from the previous year, but this was just how I started doing it. You can create a new folder by clocking the "new" button and then "folder". After you have done that you can start to create folders for each subject.

After you have your subject folders created, numbered, and color coded, I like to create sub folders for each trimester. Here is an example of how you can go about doing this.

1. Double click the science folder to open it.
2. Click "File"
3. Click "New Folder"
4. Label it "Trimester 1"
5. Repeat steps to add 2 or three more folders depending on if you have quarters or trimesters.


6. When you have finished this you could take it one step further and create sub folders for each trimester. For example under Trimester 1 you could have 3 more folders for units 1.1, 1.2, and 1.3.

This does take a lot of time up front, but in the long run it is time well spent because it saves you from having to search, remake, and re download lessons. I hope this was helpful and that it makes planning a little easier for you. Let me know how it goes if you decide to give this a try or if you have other tips to add to this to improve. I would love to hear!

Summer Planning


How to start planning for the upcoming school year without having to go in over the summer!

          One of the first things I like to do is get my new classroom layout squared away before leaving for summer. It helps to have a game plan in mind when planning lessons activities and thinking of how I will rearrange the smaller pieces of the classroom once the bigger ones have been adjusted. Also it is great to post on your classroom door or whiteboard because it can help the janitors know how everything was laid out after they finish doing the floors and begin putting everything back in the classroom.

Originally I just drew it on a piece of paper, but then I decided this would be great to do with google drawings so I could save the layouts year after year. Here is the layout at the start of school last year.


Once December comes around and the students have left for break I usually switch up the classroom ,so this was what it looked like for the second half of the year.

This coming year I am switching classrooms so I need to re think everything. As you can see I had tables before, but now I am switching back to desks. I think I will try to keep to grouping like tables except I will make sure to not having any students with the backs  toward the front of the classroom.

If you want to try to do this here are the steps to help get you started.

Step 1: Go to Google Drive

Step 2: Click "New"

Step 3: Click "More"

Step 4: Click "Google Drawings"

Step 5: Name the document by clicking "untitled" in the upper left hand corner of your computer screen.

Step 6: Below the "Format" button you will see a square and circle, click that to find shapes to create your classroom! I usually start with a square or rectangle to get started and keep adding images over for the desks and furniture.

I think that about covers everything for the Google Drawings piece!  I really like it because it is easier to go into school for a shorter period of time with a game plan. Also helps to not have to move all the furniture a bunch of times (because not everything is nice and light). 

I hope this was helpful and makes your start to planning the school year a little easier! Stay tuned for more Google Apps and technology tips to come!


Parent Portal: Using Technology to Keep Families in the Loop!


One lesson I learned very quickly when I became a teacher was the importance of the home to school connection. Parents want to know what is going on in your classroom when they aren't there and most importantly that you care and their child is having fun while they are learning! Another benefit of having technology is that this allows us to be able to let parents have that sneak peek into the classroom they are hoping for. There are two resources I strongly recommend that are great ways to strengthen and build these family relationships. They are Google Sites and the Remind App.

Image result for remind app

Lets start with the Remind App. This is a very simple app that allows parents to get texts sent to their phones with little reminders. This is great for homework, upcoming tests, important notices from the office that you want to make sure parents see. There is even a photo option that I use sometimes to take a photo of school notices and send an extra copy digitally to parents. Parents can like the posts and also follow up with a quick question if needed. There are flyers you can print to send home for parents but I usually try to get the parents to sign up the night of open house just so they know how it works and I can answer any questions while they are there. Taking the time up front definitely saves time in the end! :)

Image result for google sites

Next is Google Sites! This is something I really tried to branch out with this year and am really happy I did! Since the new update Google Sites are really user friendly and fun to make! The layouts are friendly and cheerful. This isn't something you need to have done before the school year starts either. I like to build my site as the year goes on so the parents can see what we are learning about. If you want to learn more and see step by step how you can do this yourself click the video links below to learn how!

Powered by Blogger.
Back to Top